on

RedBeard’s Donnie Darko Mask

Favorite moment of the Donnie Darko mask

I’ve been wanting to make a Donnie Darko Frank the Bunny mask for some time now and finally got around to doing before this last Halloween. Disclaimer I’m no sculptor and have no experience with this. Definitely not perfect and I’m going to retry for something better later but I’ll share anyways.


This was a ton of fun to do but I think I might take some art classes at the AR Innovation Hub, a local maker space, soon.

Materials

I used a combination of paper mache and paper mache clay to make this mask. Paper mache clay is awesome!! I started with a styrofoam form and a blank plastic mask (that was too small).

Cara Brookins has a write up on paper mache clay. Cara is an author and super mom who I hope to interview after reading a few more of her books. I had the pleasure of meeting Cara a few years ago at River City Comic Con.

Errors

As you browse through the progress you’ll notice I started off with an uneven form and it never got better. I thought I’d fill in the lower jaw area to make the mask fill the outline of the printed mask but then removed it with haste. I also found out late that the paper mache clay needs to be kneaded and worked for a while before it becomes pliable. The mask ended up being a bit small but weighed a ton like hurt your neck ton.

I learned a lot from this project. I’m open to any tips you might have for the paper mache clay and sculpting in general.


Mask from the movie no comparison


Pictures from the build


on

Industrial Shelf to Awesome Bed Build

Instead of buying an expensive frame that was large enough for a queen size mattress and provided storage I decided and be cheap and build one dubbed The Princess Bed or Big Girl Princess Bed because it’s so tall and my wife is so short.

Video below

Materials

  • Shelving
  • 6x 2×4
  • 4×8 sheet of half inch plywood
  • Reciprocating saw
  • Circular saw

The sides of the shelving came whole instead of 2 pieces so I had to cut out the supports using a reciprocating saw then cut them in half using a metal cutoff wheel on my circular saw. The bed was a bit too tall after this so I went back and cut another 2-3″ of each leg. Because the supports were welded in place I had to cut new 2×4 angled supports to make the bed more rigid. The 2×4 supports for the mattress are just the right height so that the cuts on the shelving did not have to be exactly even. The plywood was cut to fit the platform and then covered with canvas to protect the mattress.

Next for this project is a small staircase with additional storage inside.

on

R2 Trashcan

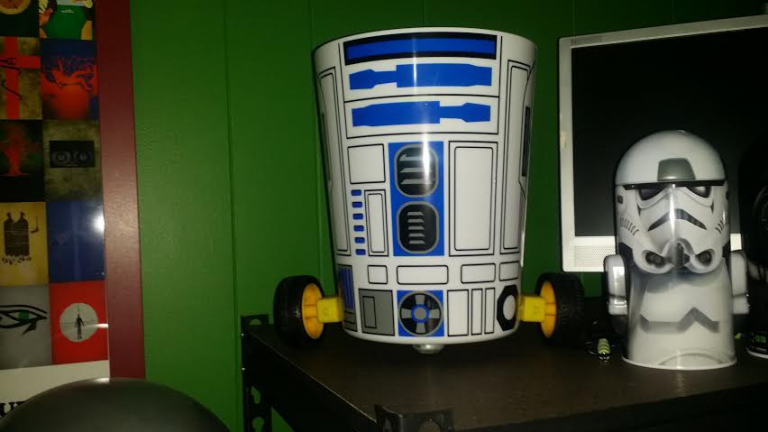
This was a fun little Arduino Robotics project that I built with my daughter at the AR Regional Innovation Hub an awesome place I mentioned in the Maker Faire post a while back. Come to think of it I need to post about this year’s Maker Faire. Anyways the robot can be controlled via bluetooth using an Android app.

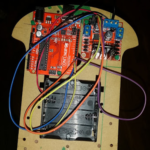
We have everything mounted to a chassis from another robotics kit much like the Ardokit but only to hold the parts. The motors were aligned with arms of R2 that were printed on the trash bin which turns out are not entirely even with each side. It should not have been a surprise but hey we wanted it to look cool. This posed additional problems with the motor mounts being flat which canted the wheels out. R2 moves a bit awkward. The plastic trash can from Target is a bit brittle so I had to tape the drill marks first and drill with care. A caster was mounted under the front of the R2 to stabilize.

Parts

  • R2 trash can from Target
  • IEIK UNO R3 Board ATmega328P from Amazon – Not an authentic arduino but works great and is cheap.
  • Motor Controller – I think this came from an ebay purchase
  • JBtek HC-05 Wireless Bluetooth from Amazon
  • Battery Pack
  • Motors and wheels from something like the Ardokit from Amazon but I’m not a fan of these because the terminals are real week and broke with very little stress.
  • Caster

I have better parts most from Adafruit coming in soon for a cooler more thought out project. Better wheels, better chassis and better motors.

on

Cheap DIY platform bed with storage

Everyone needs storage especially my daughter. Raised platforms with storage can be pricey so I grabbed shelving from a local hardware store and got busy. This particular shelving can be put together tall or side by side which made assembly so much easier and the bonus is that the shelving is almost the same width as the mattress.

  • 6 x 1×4
  • 1 x 1/4″ 4’x8′ plywood
  • Shelf
  • Wood or decking screws
  • Canvas drop cloth to protect the mattress

I assembled the shelving then laid out the boards to get an idea of where to go next. Then a quick layout of parts, measuring the area needed for the mattress and cut down the plywood to fit. The 1×4’s helped square the decking and once the desired alignment was achieved (using the wall,  a level and a square) I fixed the square in place by screwing the plywood to the slats. So now even if I took the bed and decking off, moved the bed then making everything square again is just a matter of adjusting enough so that the decking fits in place again.

At least once a day my daughter can be found hanging out underneath the bed because awesome.

on

Linksys WRT54G V8 Update

Update to my previous article on the WRT54G V8

This has to be the 4 or 5th Linksys WRT that has suddenly fizzled out. This WRT54G V8 was running modded firmware but in a stable fashion, not overclocked, not over powered. I got maybe 5 months of use out of it before it bit the dust. Linksys has been passed around to a few companies over the past 10 or so years to include Cisco and now I think I know why. With that I say farewell to Linksys and will most likely not own another.

on

Who Lives in a Pineapple?

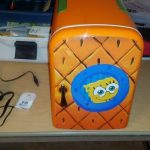
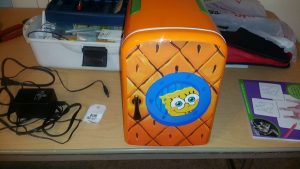
  • Spongebob Peltier Cooler missing power cord – $6 from Savers (a thrift shop) – Originally sold for $45-$60
  • DC Female Plug – $3.99 from radio shack
  • 12vdc Power Supply – $1.99 from Savers (a thrift shop)
  • Total Cost – 11.98
  • Cost Difference from Original Price: ~$38.02

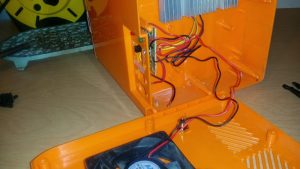
I searched for a while to try and find a power cord with no luck. So I bought and installed a new one from Radio Shack. IT WORKS!!!

on

Microwave Deathray

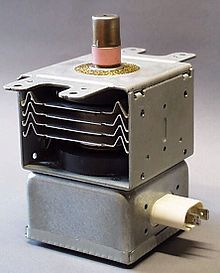
Magnetron
There is something called a Magnetron, not to be confused with Megatron,  inside your microwave. This is the primary component that vibrates the molecules of what you are heating in your microwave to generate heat. Mmmm in the words of Jim Gaffigan Haaaot Pocket!

Ok so it’s not necessarily a death ray but I wouldn’t want to put my junk in front of one. Ever heard of a herf gun? A herf gun is a directed energy weapon. Boeing’s CHAMP recently put on a show taking out targeted computers using one. Supposedly a crude herf gun can be built attaching a waveguide or horn antenna to the output of the magnetron.

Original video was pulled from Youtube updated 7/10/2016

Someone else’s crazy project

Note from wiki “a 1.1 kilowatt input will generally create about 700 watts of microwave power”

What I’d like to do

  • Build a Faraday cage so that I can safely perform testing
  • Get one of these powered up with an inline dimmer switch so that I can control the output
  • Build a horn antenna to attach to the Magnetron so that I can control the direction of output
  • Use some equipment to measure the emitted power with in controlled area
  • Use a frequency counter to get a reading of what range is play
  • Cook food from a distance
  • Light up bulbs in a field
  • Destroy some electronics

Related Projects on Instructables

[phpInstrucatblesKeyword]keyword-plasma/keyword-microwave[/phpInstrucatblesKeyword]


Click here to browse through posts written about my interests in Microwave Projects