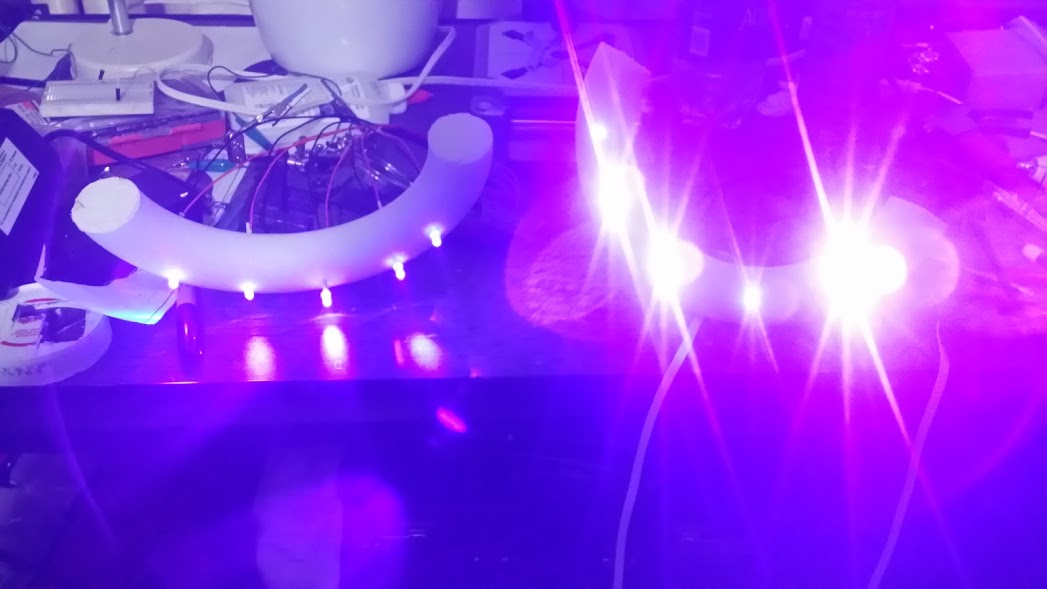
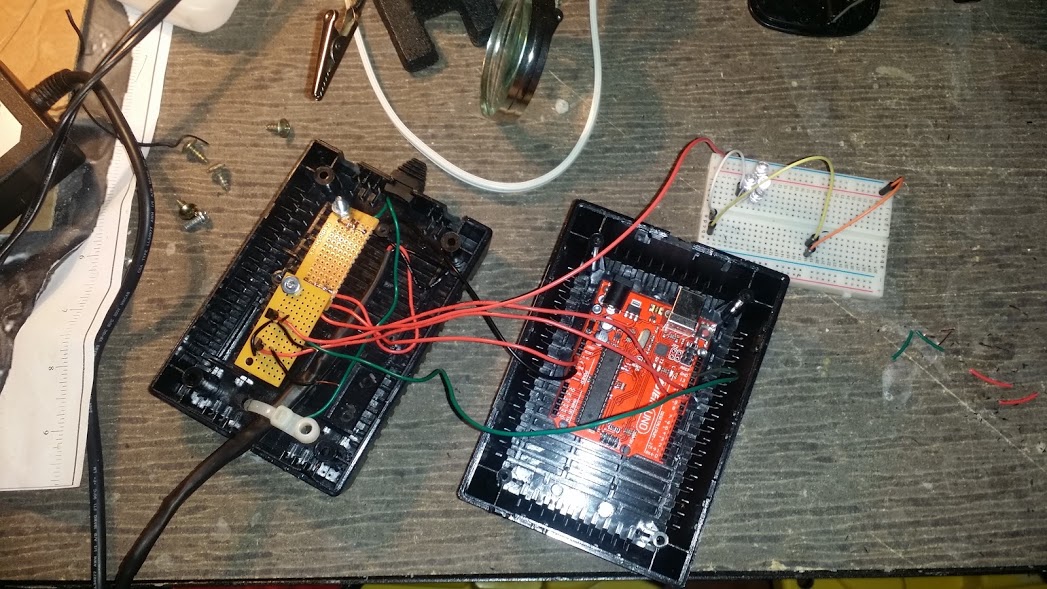
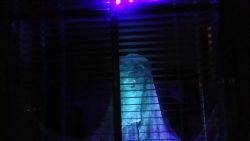
My wife, MrsRedBeard, made some glow in the dark heads for Halloween decorations. They glowed but very dim and not for very long so why not kick it it up with UV lights. But why stop there when there’s an Arduino laying around?
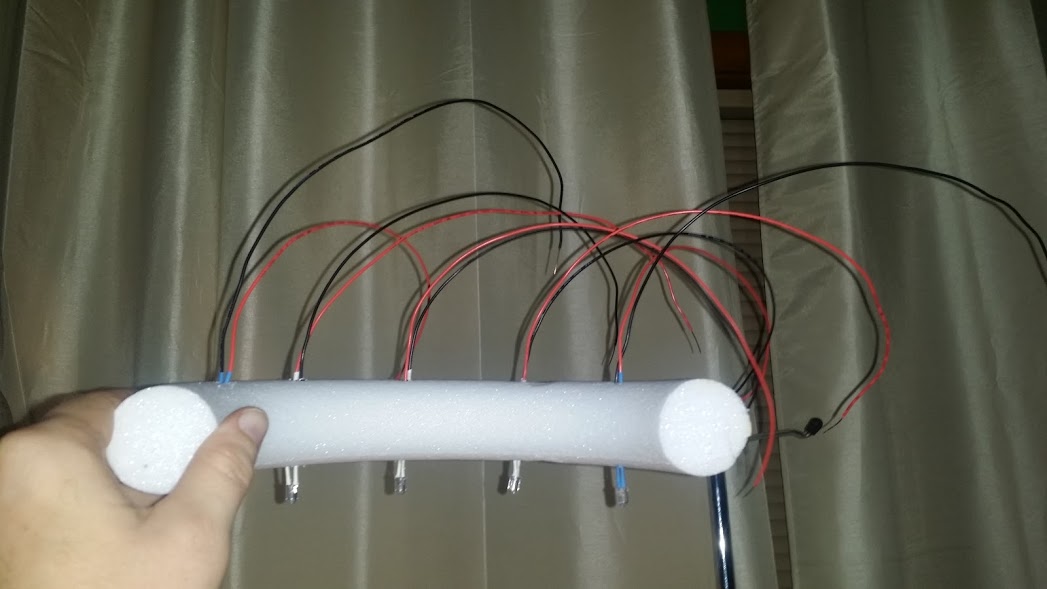
Using the Arduino I made it so that the lights fade in to brightness, blink, hold for a few seconds then turn off for a while and loop. The code for this can be found on GitHub.
I’m not getting real in-depth on how to do this because most of it is really basic. If you want additional information just Contact us.
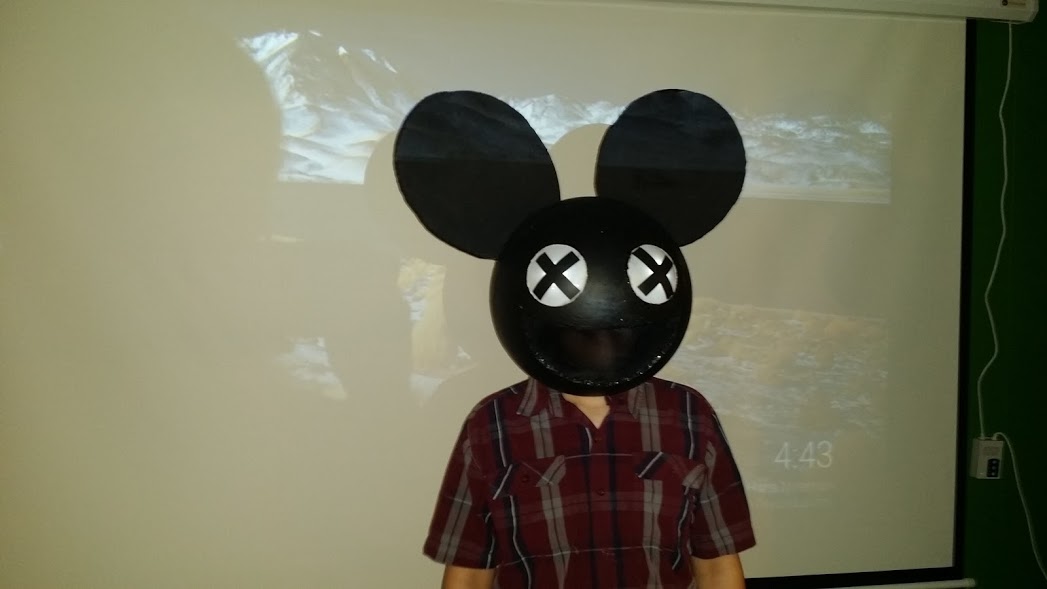
Cut the half circles to give room for the neck. Magnets hold the spheres together. Put the half spheres together and mark evenly spaced marks around on both spheres to recess 2 sets of magnets total into each side. Don’t do like me and try and use E6000 cause it melts styrofoam, use hot glue just don’t let it get real hot.
Next for the mouth and ears. Use the paper DeadMau5 Mouth template, cut slits into the paper to get the templates to lay evenly and flat onto the surface of the sphere and tape it. Mark lines lightly with a pencil then cut using the hot knife in a well ventilated area. Be careful because the foam melts easy. Use the paper DeadMau5 Ear template to mark and cut the foam for the ears. Note that you will have to cut a curve into the base of the ears to get it to lay flush.
Now for the eyes. Take the 2 Dollar Store Touch Lights apart. You are wanting the dome that acts as a light diffuser. If you get lucky you might be able to use the leds. There will be lip around the outside edge of the dome that will need to be cut off and we used a hot knife for this.
Trace where the ears will be mounted on the sphere then cut/push a recess. Use black hot glue to fix the ears to the sphere. Paint the sphere and ears using acrylic paint. We applied 2 coats to get a good black color applied. Now take the domes you cut out and trace where you want the eyes. Cut/push in the outlines to better recess the domes. In the center of these eye traces you will want to make holes just smaller than the LED you acquired. Hot glue with black glue sticks the eyes. Make Xs on the eyes using electrical tape. Trace the mouth onto the fabric using the DeadMau5 Mouth template tracing slightly larger than the original. Using the black hot glue attach the fabric inside the mouth.
Now it’s time to wire up the LEDs for the eyes. This is pretty simple so I’m not going to post additional info unless asked. Amazon failed to deliver the Red El Wire on time for Halloween but we plan to add that soon. The Red El Wire will outline the ears and mouth.
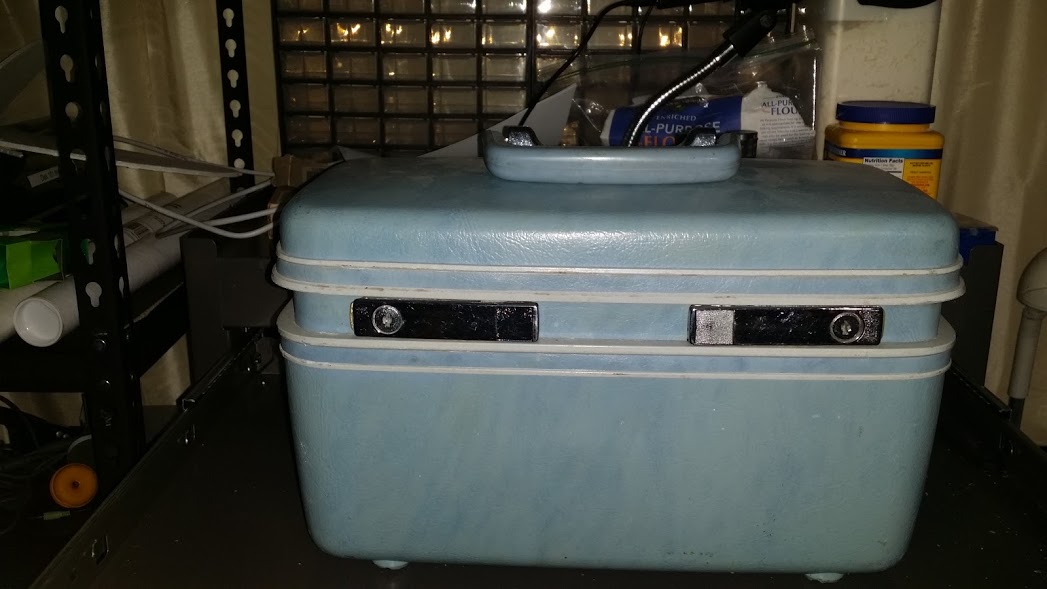
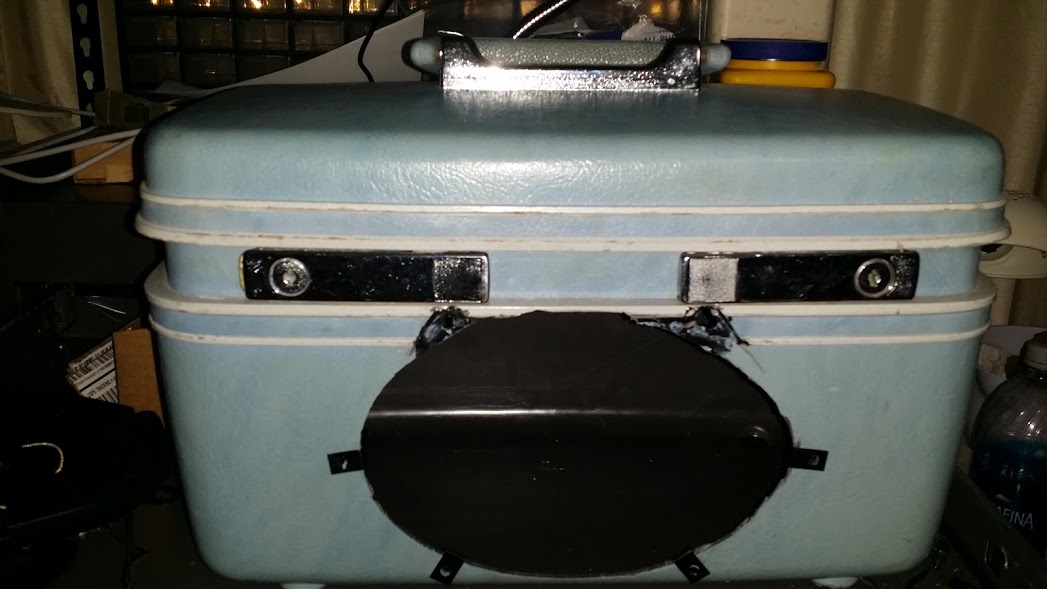
There’s a trend of bluetooth speakers built into suitcases, ammo cans and other unconventional containers. These things sell for $300 or more which is quite a bit more than what it costs to build them. I will break down the parts, sources and their prices. This project was very easy and very affordable.
If you want a custom speaker built just contact us!
The amp is rated at 50 watts per channel and the speaker is rated at 100 watts. This build only uses one speaker so I bridged the amp to output 100 watts. This amp will run off 12vdc so a portable version would be an easy build.
Speaker mounted and working. It can get pretty loud and sounds great.
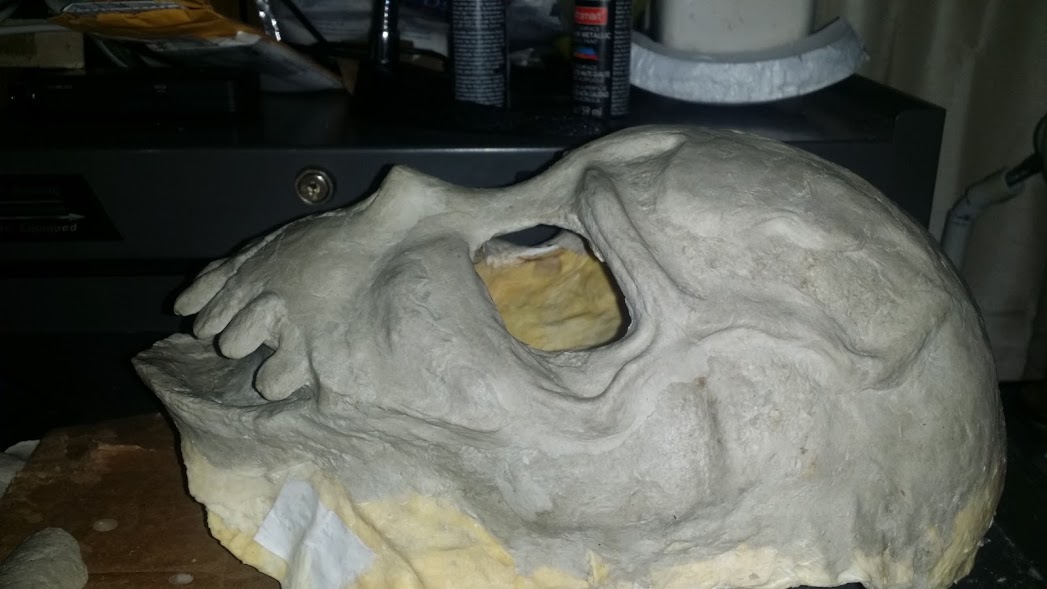
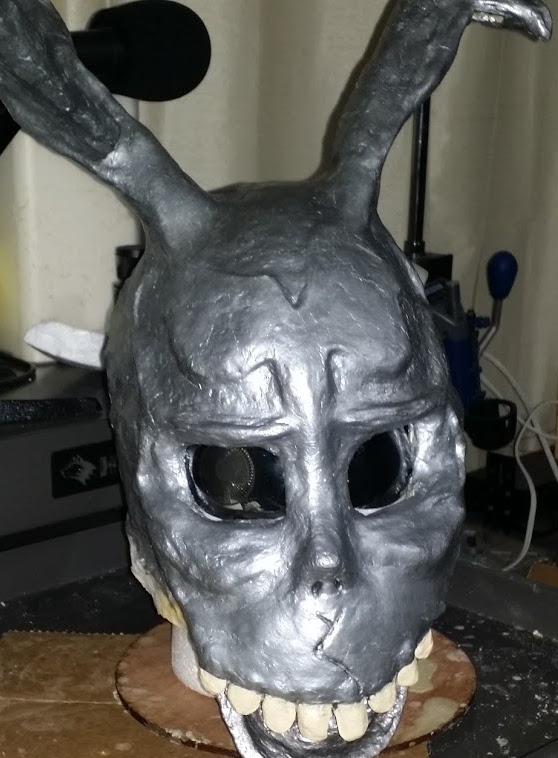
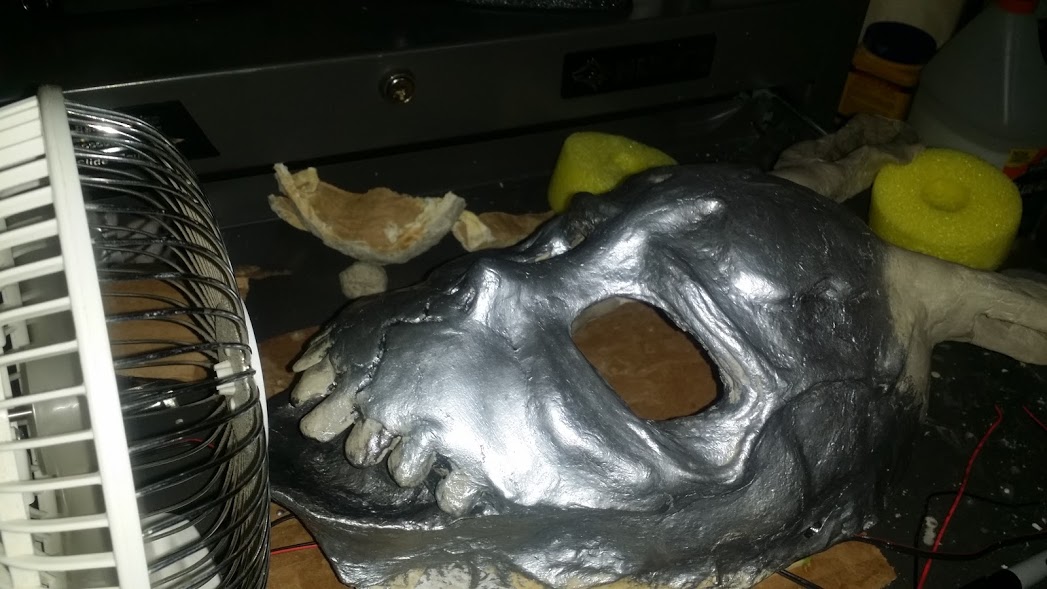
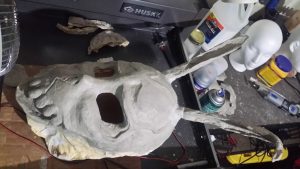
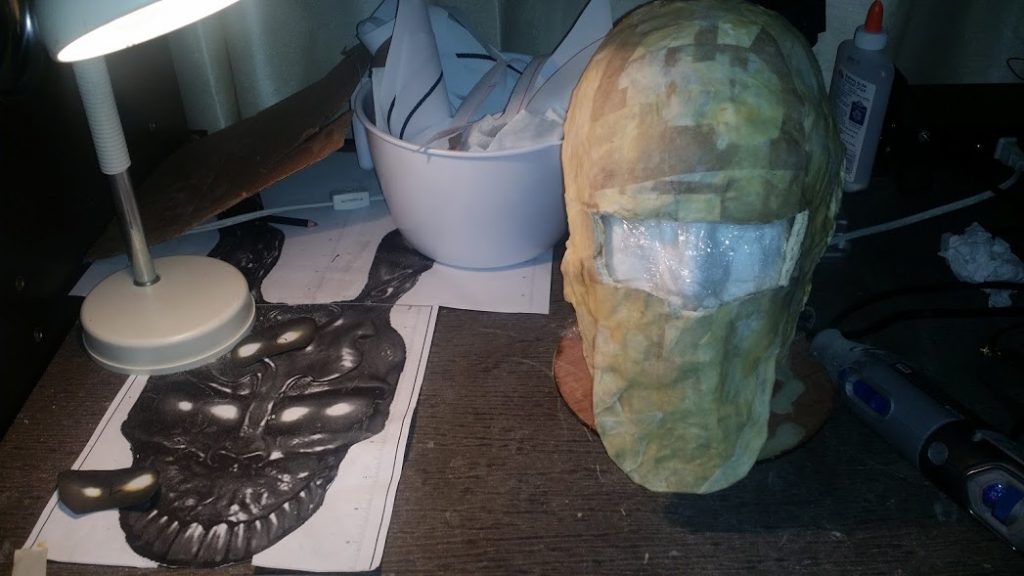
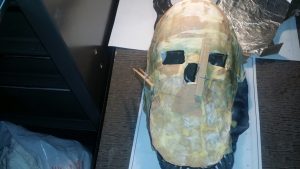
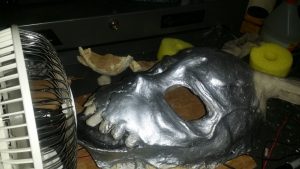
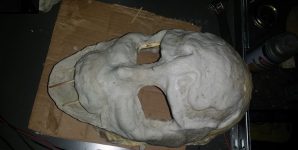
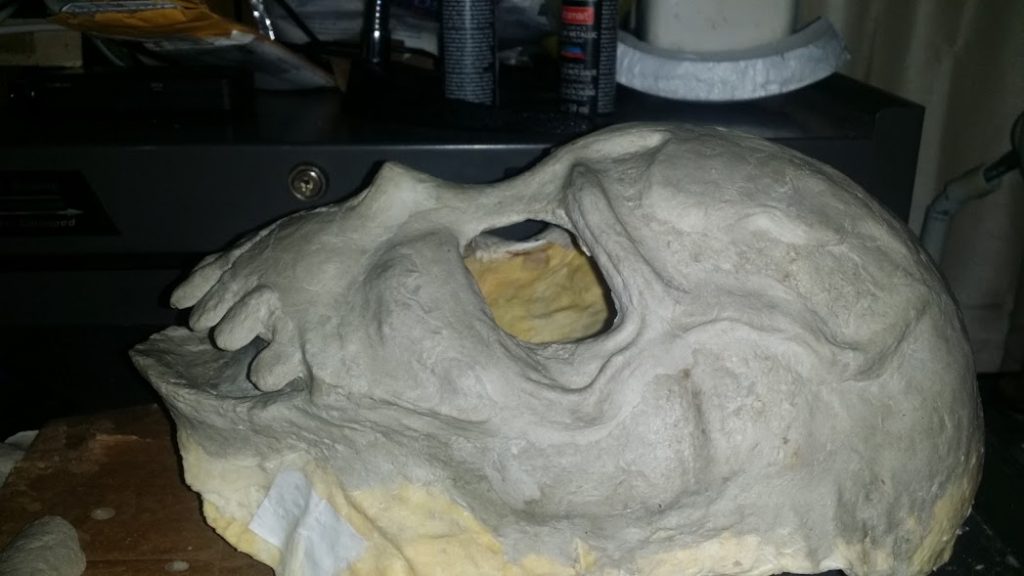
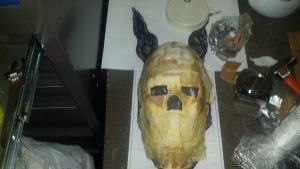
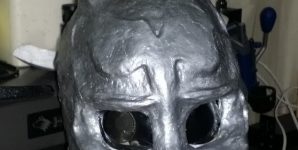
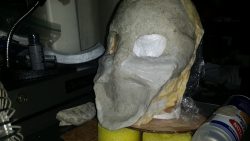
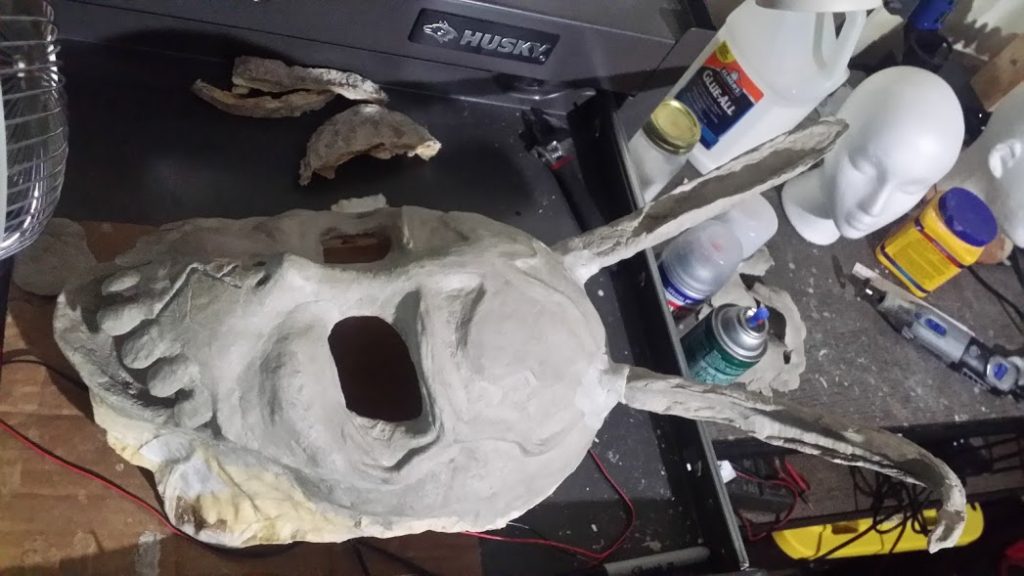
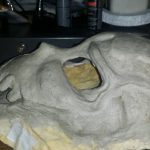
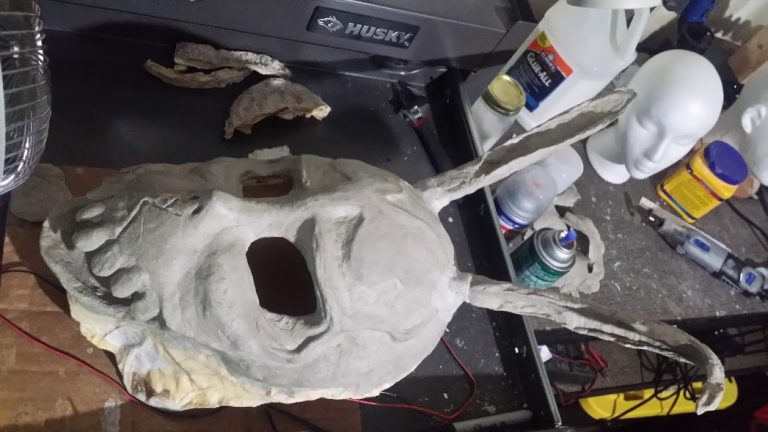
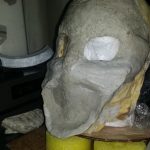
I’ve been wanting to make a Donnie Darko Frank the Bunny mask for some time now and finally got around to doing before this last Halloween. Disclaimer I’m no sculptor and have no experience with this. Definitely not perfect and I’m going to retry for something better later but I’ll share anyways.
I used a combination of paper mache and paper mache clay to make this mask. Paper mache clay is awesome!! I started with a styrofoam form and a blank plastic mask (that was too small).
Cara Brookins has a write up on paper mache clay. Cara is an author and super mom who I hope to interview after reading a few more of her books. I had the pleasure of meeting Cara a few years ago at River City Comic Con.
Errors
As you browse through the progress you’ll notice I started off with an uneven form and it never got better. I thought I’d fill in the lower jaw area to make the mask fill the outline of the printed mask but then removed it with haste. I also found out late that the paper mache clay needs to be kneaded and worked for a while before it becomes pliable. The mask ended up being a bit small but weighed a ton like hurt your neck ton.
I learned a lot from this project. I’m open to any tips you might have for the paper mache clay and sculpting in general.
I’ve been toying around with playing music using simple tones on the Arduino. I’m no composer or musician so looking around for sheet music I eventually stumbled across MXL files on a few sites like MuseScore.com. Below I have posted a sample of the Arduino playing the Stranger Things theme song.
MXL is a compressed XML file that contains the Sheet Music data, Credits, Parts, Voice Definitions, Notes, Tempo and Durations along with other information. Basically a universal format designed for composing music, project sharing and several additional applications.
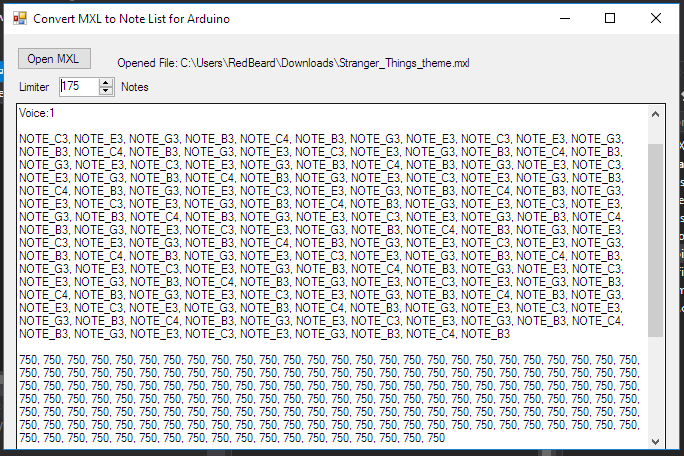
Ok so MXL files, what I keyed in on was that the MXL file contained the Notes and their Durations. This is perfect because you can create a simple Arduino code to play notes if you have this information. Sorting through these files is very daunting and time consuming so I decided to create a simple app to parse this information to use it more easily.
This app was banged out pretty quickly so please forgive possible errors. Because some MXL files are compressed and others are not I built in the code necessary to unpackage the XML before parsing. The app allows me to separate the notes by voice with their durations. In addition I placed a numeric control that limits the amount of notes that get parsed. A screenshot example is on the left.
Huge thanks to Shvelo who’s Ruby code got me pointed in the right direction.
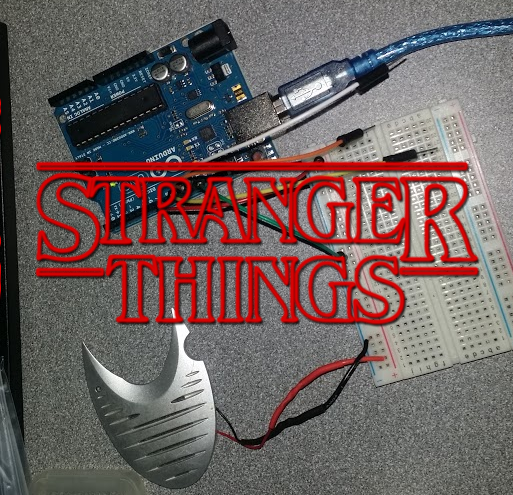
Playing the Stranger Things theme song on the Arduino was a bit tricky tweaking the tempo to make it sound right but way easier without having to manually extract the notes and durations. To the left is the simple Arduino setup using piezo from a walkie talkie wired to pin 8 and ground on the controller. Ignore the other wires because they’re not used here.
I’ve been giving robotics demonstrations to an Interfaith Summer camp being held by the ITSSM Interfaith Center while sharing some love for the AR Innovation Hub. The Hub has been such a blast to volunteer for and interact with and in addition they are always willing to help.
I wanted a way to demonstrate and provide immersion for children to learn a little about robotics so I threw this together. It’s not pretty but it sure is effective. Upon request I’m willing to write up details on the components, wiring as well as share the code used.
In addition I also toted along the R2D2 trashcan that my daughter and I built. This was a huge hit but also caused a mess when the children used R2 to transport popcorn.
A simple push button interactive arduino setup
The R2D2 trashcan that I wrote about previously controlled via bluetooth and app on an android.
We love Rick and Morty here at MickRed but know it’s not kid friendly. There are currently plans for several Rick & Morty inspired projects and they just keep coming. Adult Swim has published a Rick and Morty pumpkin stencil on their site. I’m definitely doing one of these this Halloween and maybe even a watermelon before then.
Instead of buying an expensive frame that was large enough for a queen size mattress and provided storage I decided and be cheap and build one dubbed The Princess Bed or Big Girl Princess Bed because it’s so tall and my wife is so short.
Video below
Materials
Shelving
6x 2×4
4×8 sheet of half inch plywood
Reciprocating saw
Circular saw
The sides of the shelving came whole instead of 2 pieces so I had to cut out the supports using a reciprocating saw then cut them in half using a metal cutoff wheel on my circular saw. The bed was a bit too tall after this so I went back and cut another 2-3″ of each leg. Because the supports were welded in place I had to cut new 2×4 angled supports to make the bed more rigid. The 2×4 supports for the mattress are just the right height so that the cuts on the shelving did not have to be exactly even. The plywood was cut to fit the platform and then covered with canvas to protect the mattress.
Next for this project is a small staircase with additional storage inside.
Everyone needs storage especially my daughter. Raised platforms with storage can be pricey so I grabbed shelving from a local hardware store and got busy. This particular shelving can be put together tall or side by side which made assembly so much easier and the bonus is that the shelving is almost the same width as the mattress.
6 x 1×4
1 x 1/4″ 4’x8′ plywood
Shelf
Wood or decking screws
Canvas drop cloth to protect the mattress
I assembled the shelving then laid out the boards to get an idea of where to go next. Then a quick layout of parts, measuring the area needed for the mattress and cut down the plywood to fit. The 1×4’s helped square the decking and once the desired alignment was achieved (using the wall, a level and a square) I fixed the square in place by screwing the plywood to the slats. So now even if I took the bed and decking off, moved the bed then making everything square again is just a matter of adjusting enough so that the decking fits in place again.
At least once a day my daughter can be found hanging out underneath the bed because awesome.
Since then I have taken feedback from readers and updated the schematics to be more efficient and longer lasting. I have plans to one day publish an Arduino based variable voltage and wattage version with display that will fire sub-ohm coils.

 My wife, MrsRedBeard, made some glow in the dark heads for Halloween decorations. They glowed but very dim and not for very long so why not kick it it up with UV lights. But why stop there when there’s an Arduino laying around?
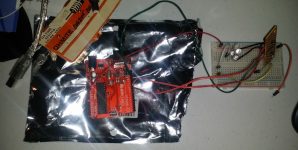


You must be logged in to post a comment.