Wismec Reuleaux RX200S Blank Screen Fix

If you want help fixing your device or want me to do it please contact me.

Wismec Reuleaux RX200S Blank Screen Fix

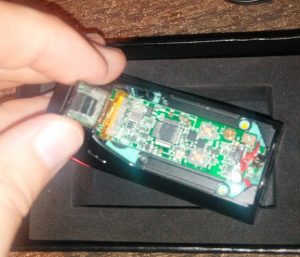
A reader sent his RX200S, after reading the rx2/3 fix, hoping I could fix a blank screen issue.

Hooked up to PC where the firmware tool successfully detected the device. Went ahead and updated the firmware to V4.13. This let me know there wasn’t a processor issue.

I disassembled and checked connections. The ribbon cable seemed loose.

RX

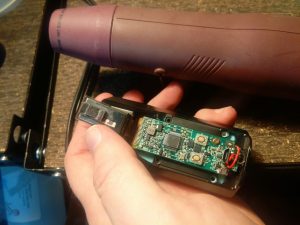
Used a heat gun to reflow the ribbon solderings. Got info on the display but it was very dim. The issue still persisted but the ribbon cable definitely needed this because it was separating from the solder.

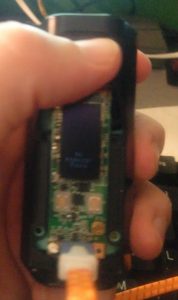
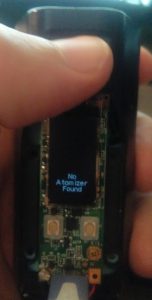
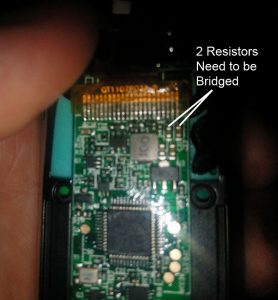
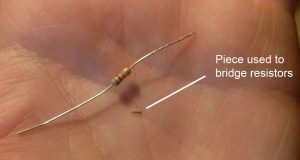
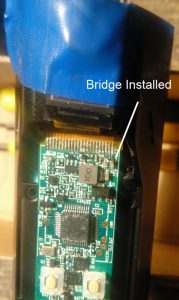
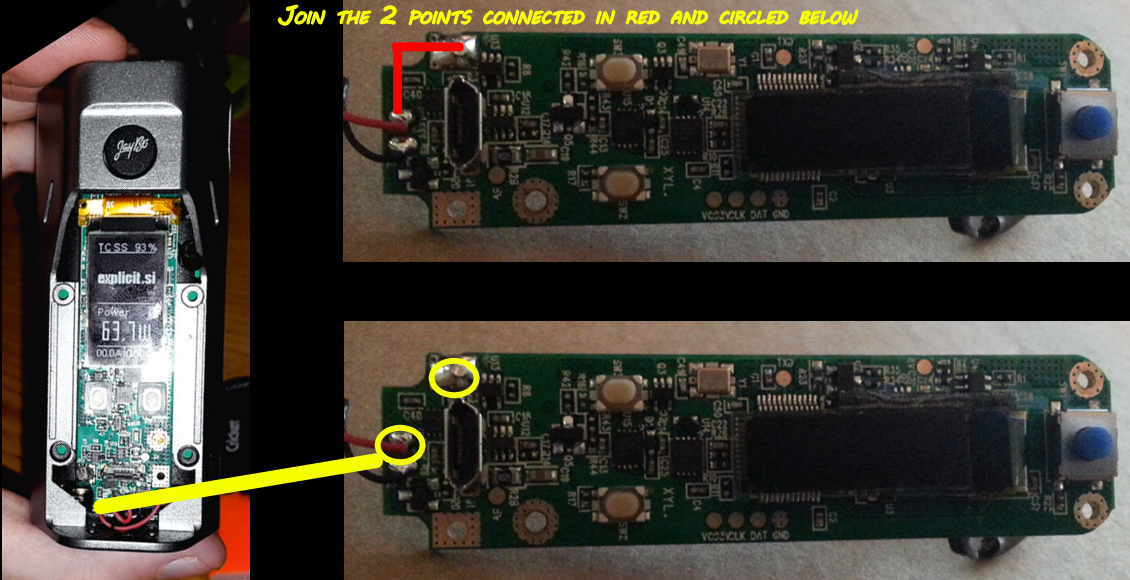
After poking around at the surface mounted resistors near the ribbon traces I found that bridging two of the resistors the screen came to life. My untested assumption is that one of the resistors went bad and bridging them brought the screen back to life.

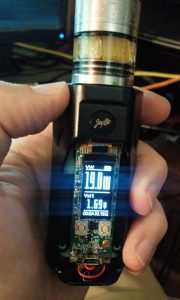
Reassembled and tested again. The resistance of the coil reads the same on 2 devices and the wattage to run the coil is equal between the 2 devices. Good to go.

Try this at you’re own risk and understand I’m not responsible for anything that goes wrong.

Wismec Reuleaux rX2/3 Check Battery Fix

If you want help fixing your device or want me to do it please contact me.

With no drops, no overheating, 2 batteries in use and a lower power user the Wismec rX2/3 started throwing a Check Battery error. I did not have the proper hex bit to do the existing standard fixes so I came up with a new fix.

To test if this is the fix for you connect a piece of wire to the 2 points below with batteries in and attempt to fire the device. If the Check Battery error does not appear then this fix should work for you.

The new fix bypasses the cover connections. With that said the note that this fix has not been checked against using 3 batteries so use at your own risk. I apologize for not taking pictures during the repair so I have illustrated over pictures posted on the net by others. Credit for original images at end of post.

Solder a wire between the 2 points circled in yellow and shown connected in red. Beauty of this fix is that you can test without the back cover. Once the new wire was is in place I reassembled with everything working.

If you use this fix contact me and let me know how it turned out.

Reuleaux RX2/3 Fix
Reuleaux RX2/3 Check Battery Fix

Try this at you’re own risk and understand I’m not responsible for anything that goes wrong.

Image adapted from

Philips TV Model 37mf331d/37 Power Supply Repair

Philips TV Model 37mf331d/37
2006 – 37” LCD TV with Fluorescent Backlight
Information on TV

Got a call about this Philips TV and was asked if I could fix it. When I went to check it out the TV was already taken apart and the owner had already researched the issue identifying the power supply as the culprit. At first look I saw that he was right because there was a section blown out to include an erupted capacitor. So I left with a part number of and the power supply.

715t2056-1 Issues Identified
715t2056-1 Issues Identified  

Power Supply Unit: 715t2056-1

This the same power supply used in several products so I thought if nothing else I might be able to salvage an old power supply board from something else. Its more fun to try and fix the issue so I was hoping salvage wouldn’t be the solution. I ordered the surface mounted resistor, zener diode and capacitor from Mouser for less than $2.

I removed and replaced the capacitor with no issues. Then I began to remove the diode and the damage really reared its head. Whenever these parts blew it blew a chunk of circuit board with it that wasn’t noticeable until the solder was taken off. This took off the surface mounted resistor and the mounting location for one side of the diode. Well crap! After giving this some thought I came to the conclusion that the resistor was probably more for tolerance matching and protection than anything else so I refilled the broken trace and connected the diode directly to it. This was a bit sloppy due to the missing pieces of circuit board so I covered the area with hot glue to secure it.

715t2056-1 New Part Installed Top
715t2056-1 New Part Installed Bottom

A. Capacitor  B. Diode Connection  C. Repaired Broken Trace, Bypassed Resistor & Diode Connection

Not being able to test it immediately after repair made me a bit worried. Today I went back and installed the repaired power supply and reassembled the TV just enough to test it out. When we plugged it in I could hear it hum to life automatically. Initially it did nothing but light up the power button but after a few seconds the screen came on and this older flat-screen TV got an extended life for less than two dollars.

Top